2nd part of the series | Setting up our backend server for our whitelist system

Shiawase • 2025-2-8 • 15 minutes
- If you haven’t read the introduction of this guide, you can check it out here
- You can check out the repository for this guide here
Introduction
In this part of the guide, we will be setting up our backend server for our whitelist system. We will be using Node.js for this, as it is a popular choice and versatile choice.
We will also be using Express.Js, a popular web framework for Node.js, to make our server setup easier.
Setting up your project
First, you will need to create a new directory for your project. We will call it RBLXWhitelist.
md RBLXWhitelistYou’re free to place the project wherever you want, but for this guide, this is our structure:
RBLXWhitelist/
├── src/
│   ├── client/
│   └── server/
Next, navigate into the server directory and initialize a new Node.js project.
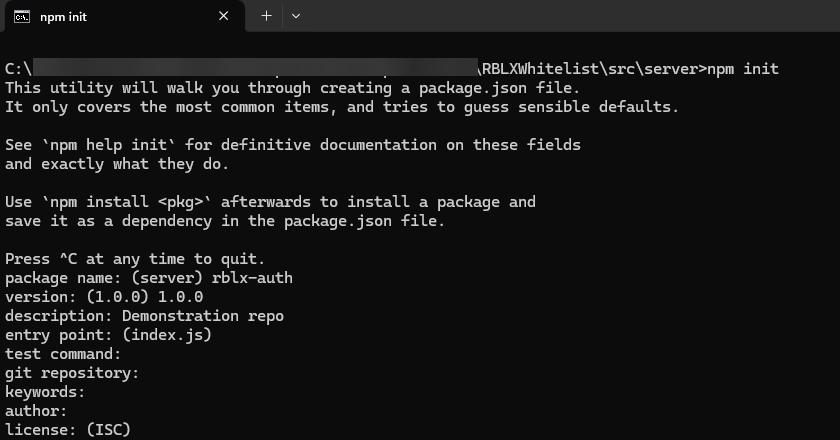
- You do not need to fill in ALL the details, you can just press enter for each prompt.
Installing dependencies
Now that we have our project setup, we will need to install the dependencies (packages) for our server. The two main packages are express and @supabase/supabase-js.
npm install express @supabase/supabase-jsSetting up the server Pt. 1
Now that we have our dependencies installed, we can start setting up our server. Create a new file called index.js in the same directory where you’ve installed your packages (denoted by the existence of the node_modules directory).
In this file, we can write an example endpoint that will return a message whenever we request it, we will update this later.
// src/server/index.js
const express = require('express');
const app = express();
const port = 3000;

app.get('/', (req, res) => {
  res.send('Hello World!');
});

app.listen(port, () => {
  console.log(`Example app listening at http://localhost:${port}`);
});
Testing the server
To run the server, you can use the following command:
node index.jsAnd you should see the following output:
Example app listening at http://localhost:3000
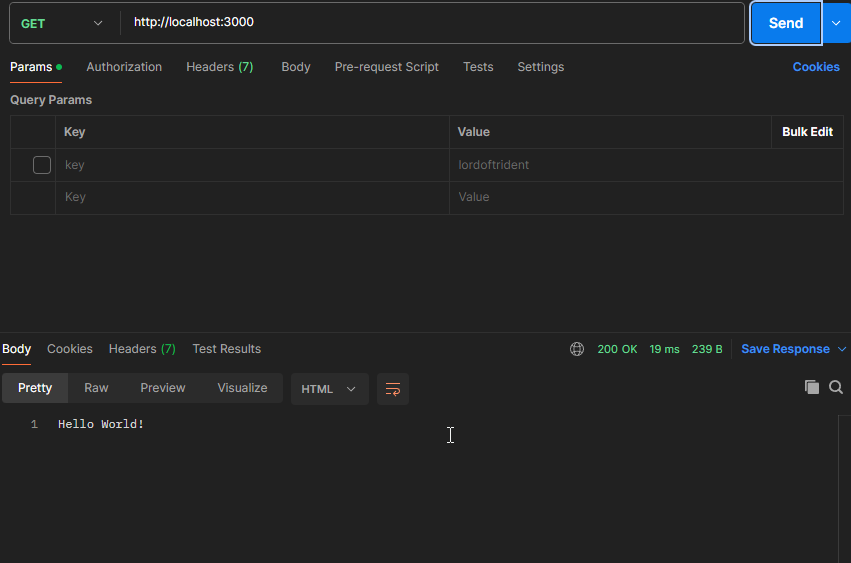
You can now navigate to http://localhost:3000 in your browser, and you should see the message Hello World!.
- If you want to better debug & test your server locally, you can use a tool like Postman to send requests to your server.
Database setup (Supabase)
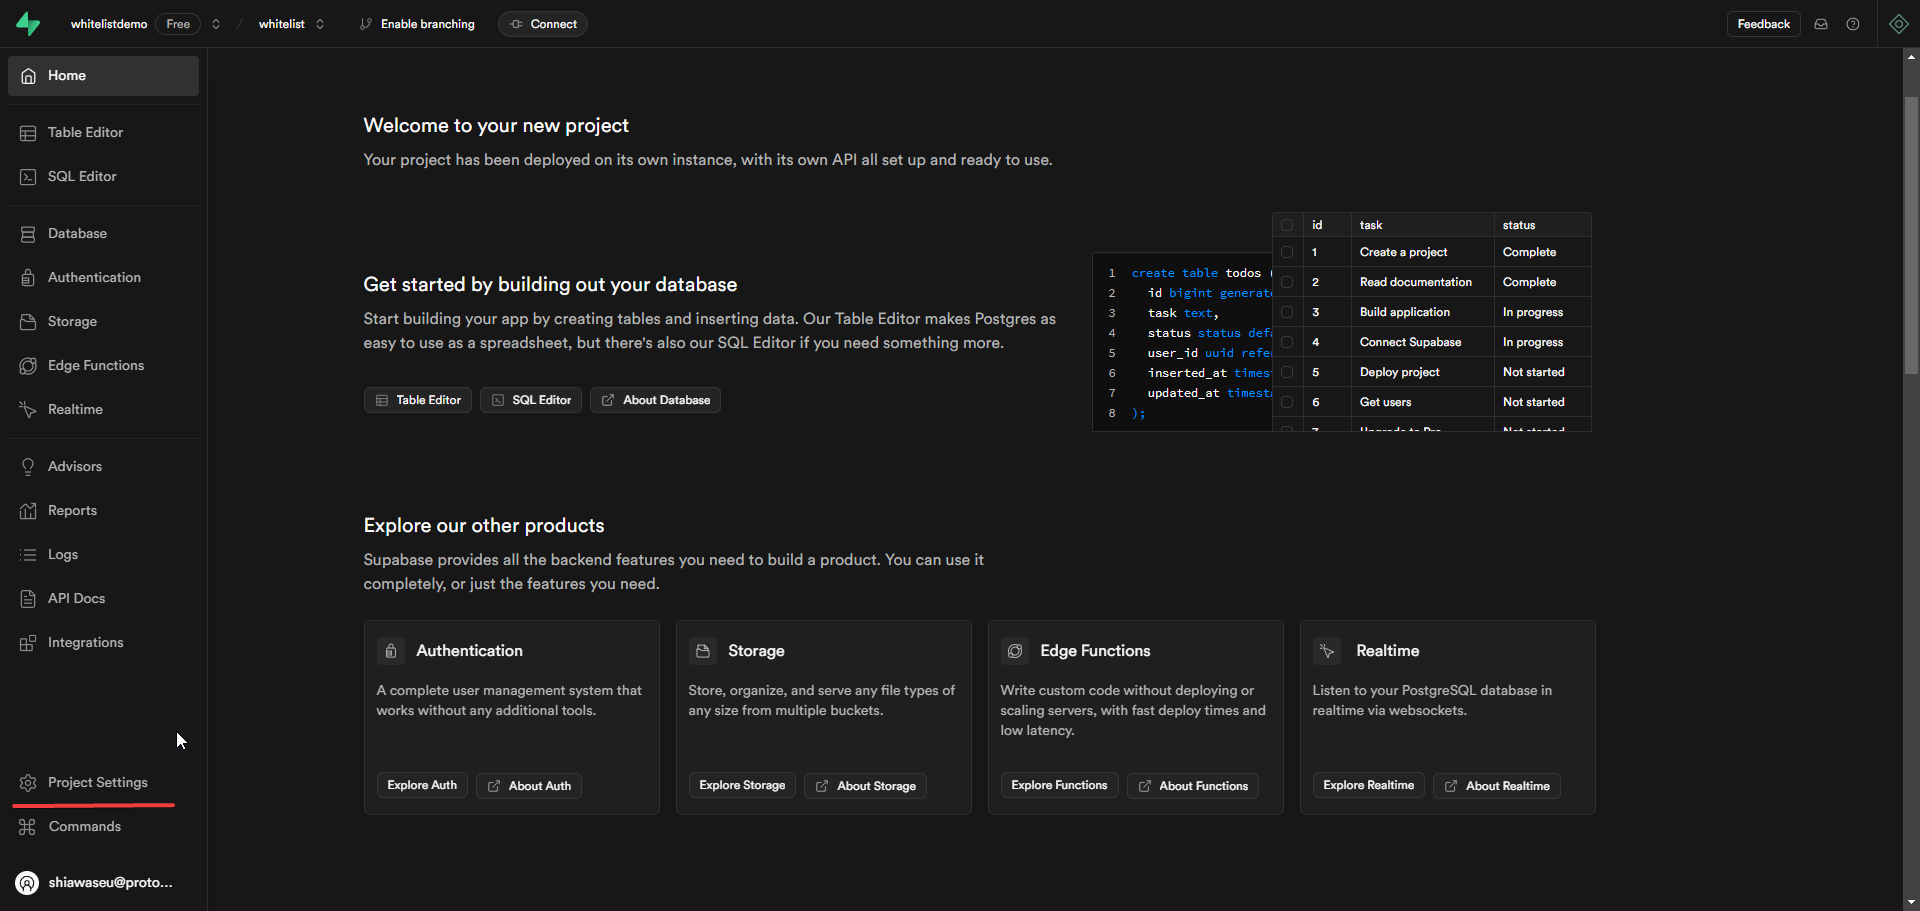
To setup our Supabase database, we will head over to the Supabase website, and create a new project. Once you’ve created your project, you will retreive 2 things from the project’s settings then navigate to the SQL editor and create a new table.
| Before creating a database, you may be prompted to create a new organization. You can do so by clicking on the “Create organization” button.
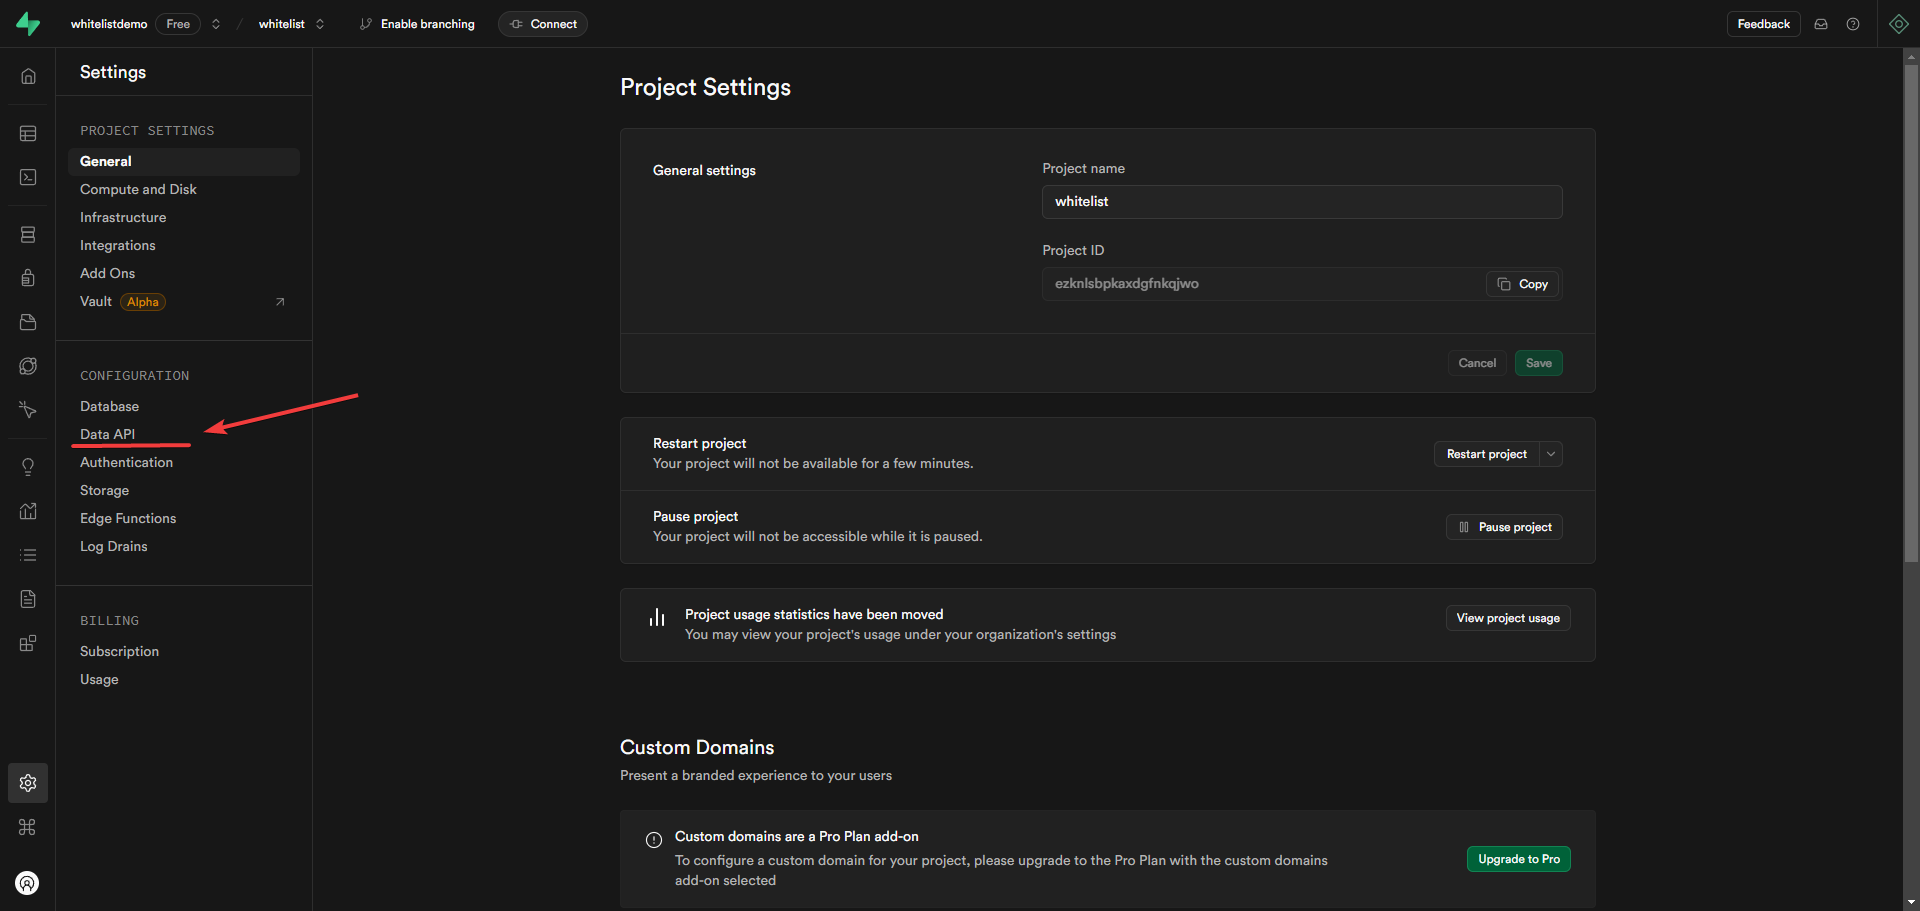
Before you create the table, you need to copy the URL and the service key from the project settings. You can find these in the API section of the project settings.
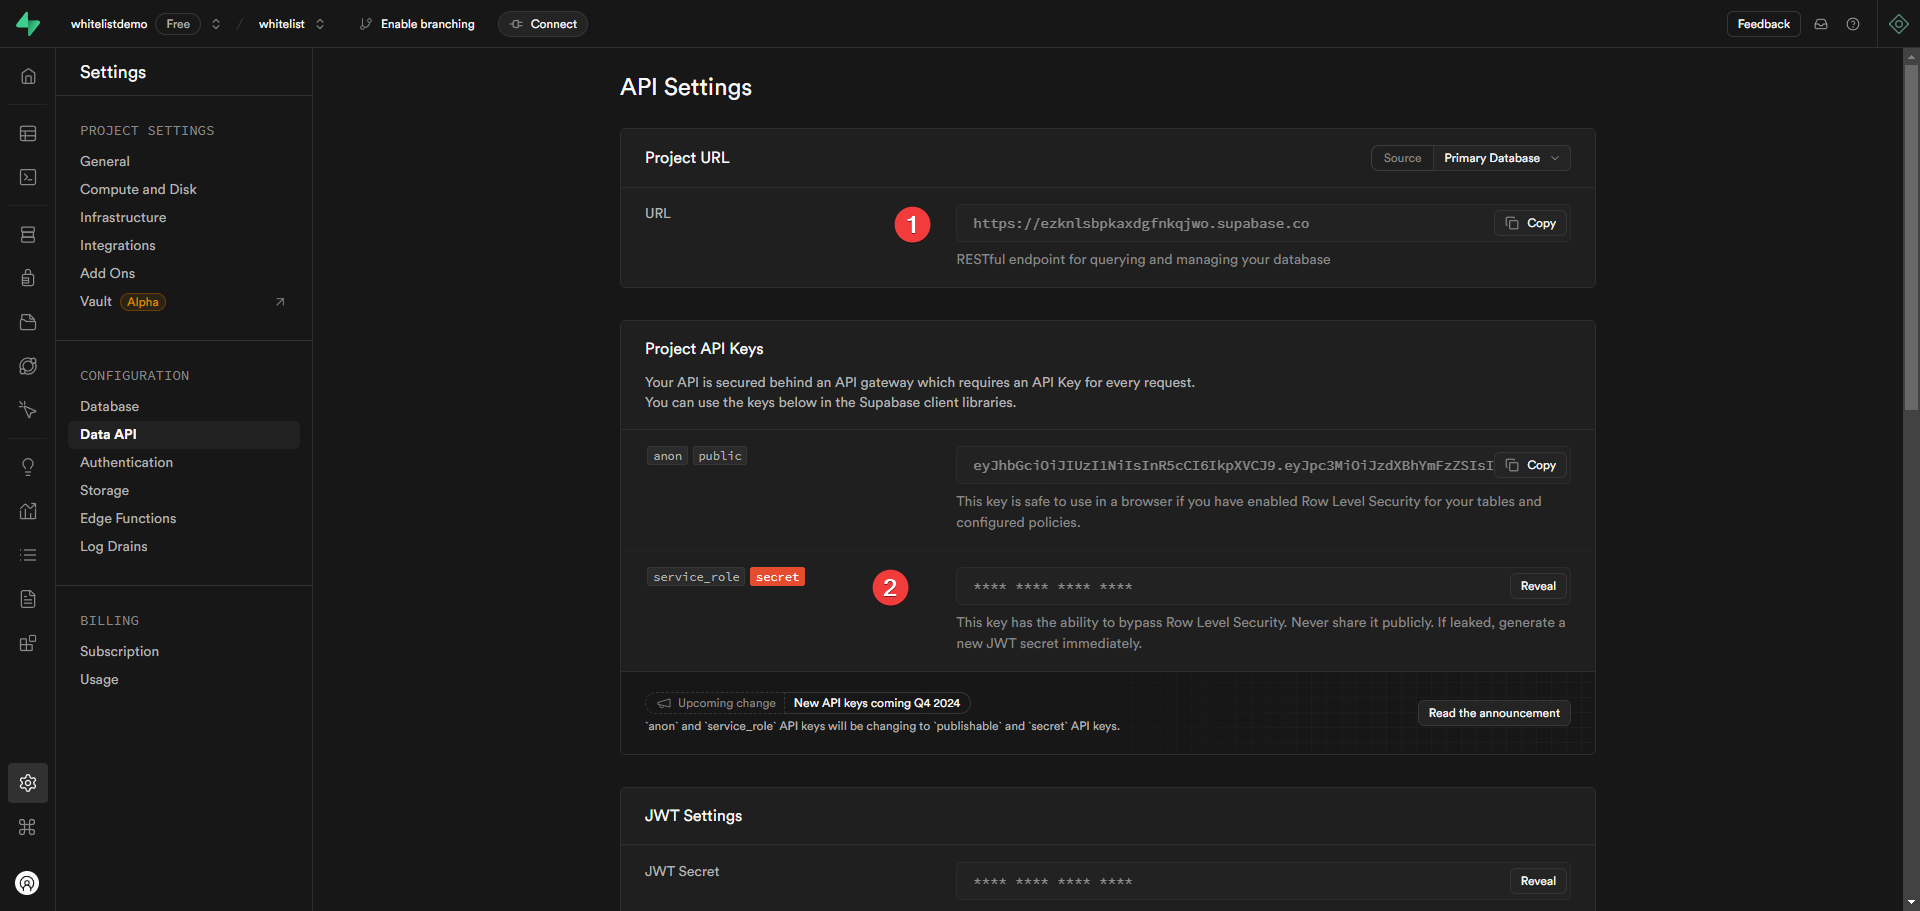
Now, navigate to the SQL editor and create a new table called whitelist with the following schema:
CREATE TABLE whitelist (
  id SERIAL PRIMARY KEY,
  whitelistkey TEXT,
  fingerprint TEXT
);
| For demonstration purposes, we will be using the minimal schema. You will add more columns as needed in a full-scale project.
If you’ve done that correctly, you should receive an output message saying Success. No rows returned
Then, you can insert a new row into the table with the following query:
INSERT INTO whitelist (
  whitelistkey, fingerprint
  )
  VALUES (
    'myexamplekey', NULL
);- You can replace
myexamplekeywith any key you want | Just make sure to remember it for later.
Setting up the server Pt. 2
Now that we have our database setup, we can now connect our server to the database using the @supabase/supabase-js package we installed earlier.
First, create a new file called supabase.js in the same directory as index.js. In this file, we will write the code to connect to our Supabase database.
// src/server/supabase.js
const { createClient } = require('@supabase/supabase-js')

// These are your 2 values from your Supabase project we copied earlier, place them here
// You can read more about what keys can access & do here: https://supabase.com/docs/guides/api/api-keys
const supabaseUrl = 'https://your-supabase-url.supabase.co'
const supabaseKey = 'your-service-role-key'

const supabase = createClient(supabaseUrl, supabaseKey)

module.exports = supabase
Next, we will import this file into our index.js file and use it to query our database.
What we want to query is the whitelist table we created earlier, and check if the key provided within the request matches any of the keys in the table. If it does, we will return an indicator in JSON format.
// src/server/index.js
const express = require('express');
const supabase = require('./supabase'); // Import the supabase file we created
const app = express();
const port = 3000;

// You can leave the code we wrote earlier as it is

app.use(express.json());

app.post('/whitelist', async (req, res) => {
  const { whitelistkey } = req.body; // We assume the key is sent in the body of the request
  const { data, error } = await supabase
    .from('whitelist')
    .select('*') // An asterisk (*) means we want to select all columns
    .eq('whitelistkey', whitelistkey)
    .single();

  if (data) {
    return res.json({ valid: true });
  } else {
    return res.json({ valid: false });
  }
});
Once you’ve done that, you can test the server again by running node index.js and sending a POST request to http://localhost:3000/whitelist with the following JSON body:
{
  "whitelistkey": "myexamplekey"
}
You should receive a response in JSON format indicating whether the key is valid or not. If you’ve done everything correctly, you should see the following output:
{
  "valid": true
}
Setting up the server Pt. 3
- For the rest of the guide, keep in mind “fingerprint” is the same thing as “HWID”
With the whitelist endpoint being functional, we will now also start checking the fingerprint of the user.
For this, we will add a list of allowed fingerprints to our server, and check if the request has any of these fingerprints (corresponding to executors). If it does, we will proceed with the whitelist check, otherwise, we will return an invalid response.
- For a visual representation of the flow, you can refer to the following diagram in the repository here (Ignore some of the details in the diagram, we will get to these in part 4.)
// src/server/index.js

// For ""security"" reasons, we only allow requests with these fingerprints; this can also be used to enforce the whitelist to only run on specific executors.
const allowed_fingerprints = [
  'wave-fingerprint',
  'sirhurt-fingerprint',
];

app.post('/whitelist', async (req, res) => {
  const { whitelistkey } = req.body;
  const headers = req.headers;
  let foundFingerprint = null;

  for (const fingerprint of allowed_fingerprints) {
    if (headers[fingerprint]) {
      foundFingerprint = headers[fingerprint];
      break;
    }
  }

  // No fingerprint was found --> most likely an illegal request / unsupported executor
  if (!foundFingerprint) {
    return res.json({ message: "No fingerprint..." });
  }

  const { data } = await supabase
    .from('whitelist')
    .select('*')
    .eq('whitelistkey', whitelistkey)
    .single();

  if (data) {
    if (data.fingerprint === foundFingerprint) {
    // Case 1: The whitelist entry has the same fingerprint as the one we found
      return res.json({ valid: true });
    } else if (data.fingerprint === null) {
      // Case 2: The whitelist entry has no set fingerprint, so we set one
      const { error: updateError } = await supabase
        .from('whitelist')
        .update({ fingerprint: foundFingerprint })
        .eq('whitelistkey', whitelistkey);

      if (updateError) {
        return res.json({ valid: false });
      }

      return res.json({ valid: true });
    } else {
      // Case 3: The whitelist entry has a different fingerprint than the one we found
      return res.json({ valid: false });
    }
  } else {
    // Case 4: The whitelist entry does not exist at all
    return res.json({ valid: false });
  }
});
Conclusion
With this, we have successfully set up our backend server for our whitelist system. We have also connected our server to a Supabase database, and we have written an endpoint that checks if a key is valid and if the fingerprint matches the one we have stored in the database.
Next up, we will write our client (script) code in Part 3!